
Let’s be honest…. Most of us don’t casually have a stump grinder sitting next to the lawn mower in the garage.
You know… right between the leaf blower and the industrial wood chipper we definitely don’t own.
If you’re staring at a stubborn tree stump and thinking, “I am not renting a 300-pound machine for this,” you’re in the right place.
This guide shows you how to remove a tree stump with a drill and Epsom salt — a budget-friendly, DIY method that works without heavy equipment.
Why Use Epsom Salt to Remove a Stump?

Epsom salt (magnesium sulfate) works by:
• Drawing moisture out of the wood. •Drying the stump internally.
• Speeding up the natural rotting process.
• Making the stump easier to break apart later
Unlike chemical stump removers, this method is inexpensive and simple.
⸻
Tools & Materials You’ll Need
🛠 Supplies:
• Power drill

—DEWALT 20V MAX Cordless Drill/Driver Kit DCD771C2
Reliable torque and perfect for outdoor projects.
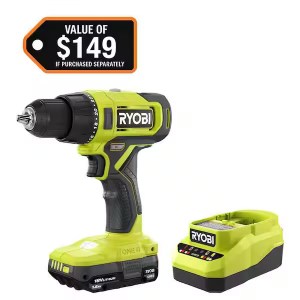
—RYOBI ONE+ 18V Cordless 1/2 in. Drill/Driver Kit PCL206K2
Affordable and great for DIY homeowners.

•1-inch spade drill bit (long bit preferred.
• Epsom salt (magnesium sulfate).
• Funnel.
• Hot water.
• Plastic tarp or trash bag.
• Waterproof tape or heavy rocks.
• Safety glasses.
• Work gloves
⸻
Step 1: Cut the Stump as Low as Possible

Use a chainsaw to cut the stump as close to the ground as you safely can. The flatter the surface, the easier it will be to drill evenly spaced holes.
⸻
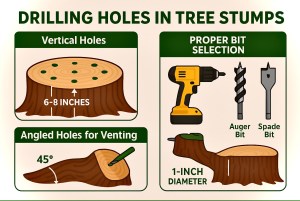
Step 2: Drill Deep Holes Into the Stump
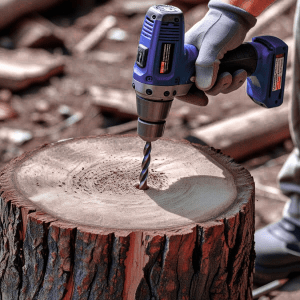
• Use a 1-inch spade bit.
• Drill holes 8–12 inches deep.
• Space holes about 1 inch apart.
• Drill around the outer ring and throughout the center.
Tip: The more holes you drill, the faster the stump will break down. For larger stumps, also drill angled holes from the sides to reach deeper roots.
⸻
Step 3: Fill the Holes with Epsom Salt

• Pour dry Epsom salt into each hole.
• Fill completely to the top.
•Use a funnel to prevent spills.
Do NOT use regular table salt — it will damage surrounding soil.
⸻
Step 4: Add Hot Water

• Pour hot water into each hole.
•This helps dissolve the salt so it penetrates deeper.
• Do not flood — just enough to moisten the salt.
⸻
Step 5: Cover the Stump
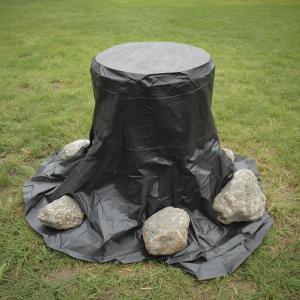
• Cover the stump with a tarp or thick plastic.
•Secure with tape, bricks, or rocks.
•This keeps moisture in and rain out.
⸻
What Happens Next?
Timeline:
The stump will begin drying and rotting from the inside.
• 4–6 weeks: Stump becomes noticeably dry and cracked.
•2–3 months: Wood softens significantly.
• 3–12 months: Stump can be broken apart with an axe or shovel
Larger hardwood stumps (like oak) may take longer.
⸻
How to Finish Removing the Stump
Once softened:
• Use an axe to break apart the wood.
•Dig around roots with a shovel.
•Remove chunks gradually.
•Compost the rotted pieces if desired.
Optional: After drying, some people choose to burn the stump (check local regulations first).
⸻
Pros and Cons of This Method
Pros
•Affordable.
•No heavy machinery.
•Minimal yard damage.
•Safe when done properly
Cons
• Takes time
• Not instant removal
• Less effective on very large hardwood stumps
⸻
Tips for Faster Results
• Drill as many holes as possible
• Reapply Epsom salt every 3–4 weeks
• Keep stump covered
• Start during warm months (heat speeds decomposition)
⸻
Is This Method Safe for Your Yard?
Epsom salt is less harmful than chemical stump removers. However:
• Avoid over-applying near garden beds
• Do not use near plants you want to keep
• Keep pets from ingesting salt
⸻
When Should You Hire a Professional?
Consider professional stump grinding if:
• The stump is extremely large
• It’s near a foundation or driveway
• You need immediate removal
• It’s blocking construction plans
⸻
Final Thoughts
Removing a stump with a drill and Epsom salt is a simple, budget-friendly DIY method that works — but it requires patience. If you’re not in a rush and prefer a natural approach, this is one of the easiest ways to break down a stump over time without heavy equipment.
Disclosure: Article may earn commission. Thanks so much for reDing!
Leave a Reply